The Flows page
The Flows page lists every flow you have access to, grouped into Active, Completed, and Archived sections.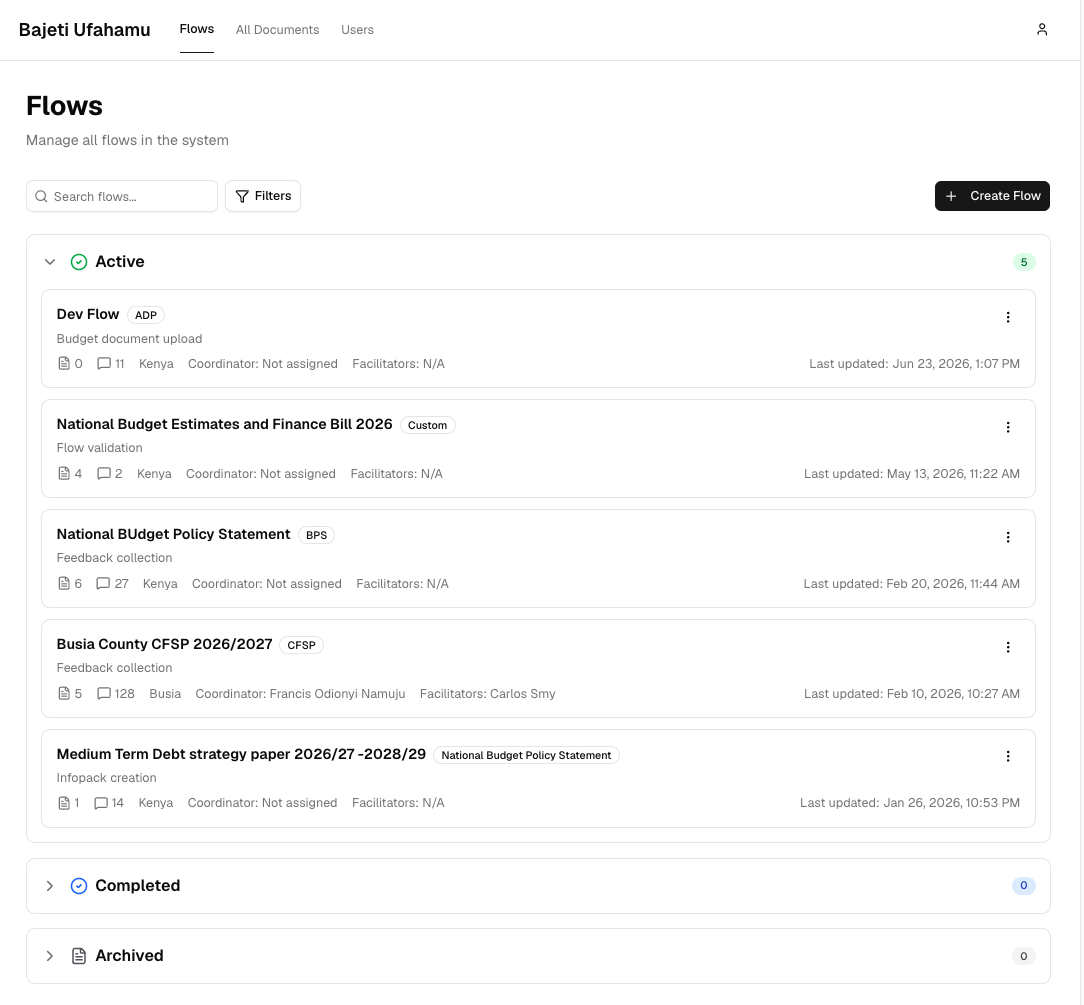
The Flows page, grouped by status
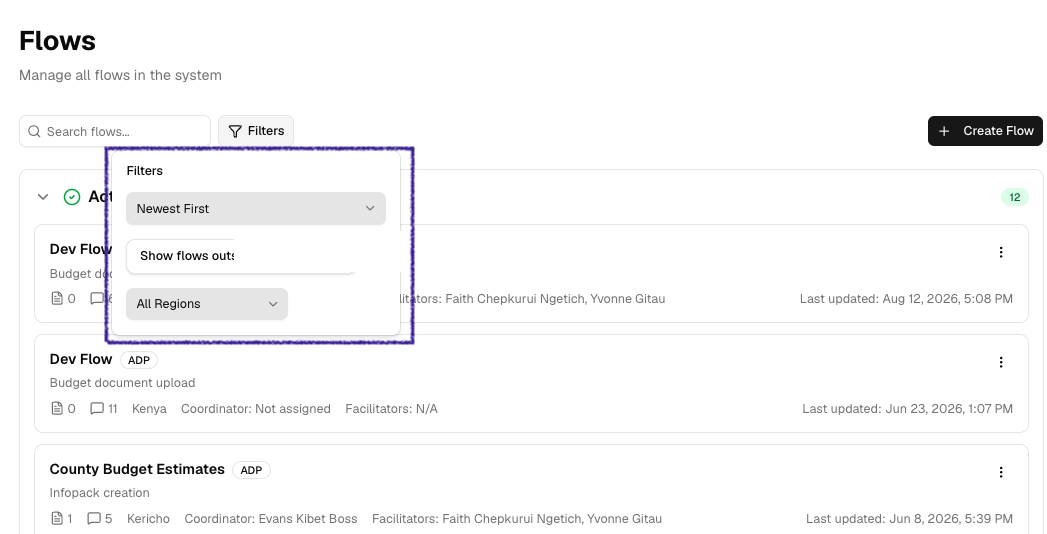
Search, filter, sort, and the My flows / All flows toggle
Create a flow
Role access: Facilitator and above1
Click Create Flow
From the Flows page, click Create Flow.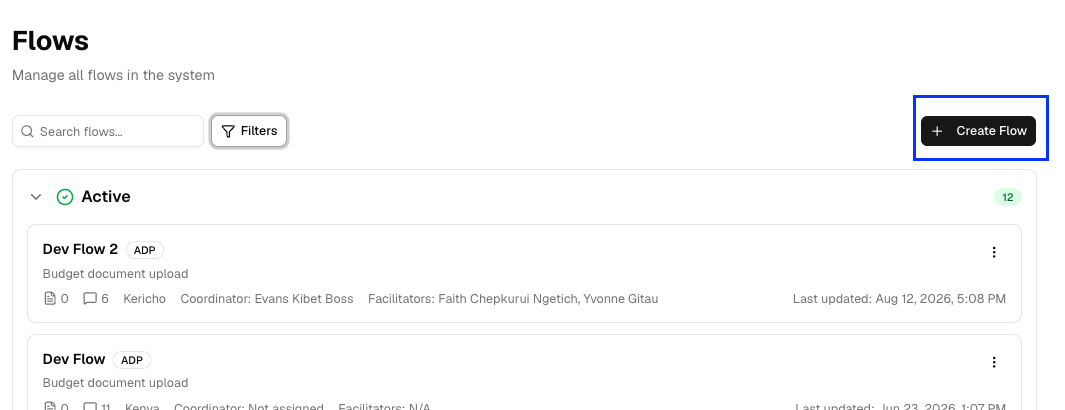
2
Fill in the flow details
- Flow Name (required) this is the name that is used to identify the flow in the app and on whatsapp. It should clearly indicate what document the flow represents as well as the year.
- Flow Type (required): the budget document whose lifecycle this flow is tracking. Options are: BPS, ADP, CFSP, County Budget Review, Sector Working Report, or Custom
- Status: controls which section of the Flows page the flow shows up in. Default is Active.
- Location Type: the administrative level the flow belongs to: County, Region, or Country.
- Location: the specific county/region/country the flow is for; options are limited to your own assigned location and its scope (a Facilitator only sees their county; a Coordinator sees their region and its counties)
- Description (optional): A description of the flow that is being created.
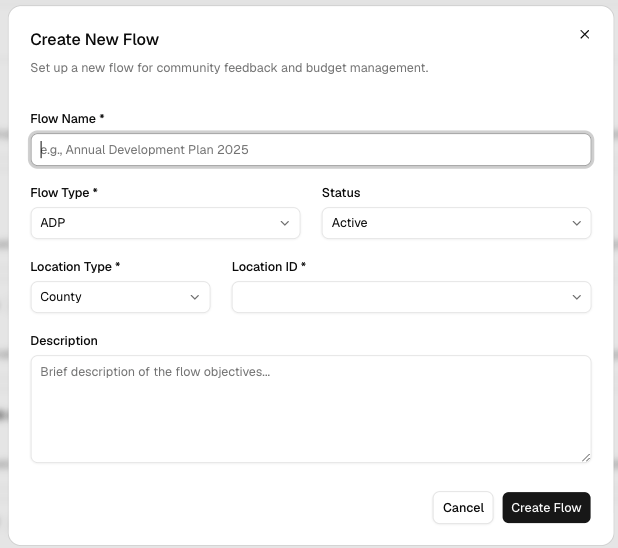
The Create Flow form
3
Submit
Click Create Flow to save it. It appears immediately in the Flows list.
Coordinator, facilitator and champions are automatically assigned to flows
based on the location.
Edit a flow
Role access: Facilitator and above, within their location scope From the Flows page, open the ⋮ menu on a flow card and choose Edit Flow. This opens the same the edit form. Update any field and click Update Flow.Archive a flow
Role access: Facilitator and above To archive a flow, edit it and set Status to Archived, then save. The flow moves to the Archived section of the Flows page.The flow detail page
Clicking a flow opens its workspace, with five tabs: Overview, Analytics, Documents, Feedback, Connectors.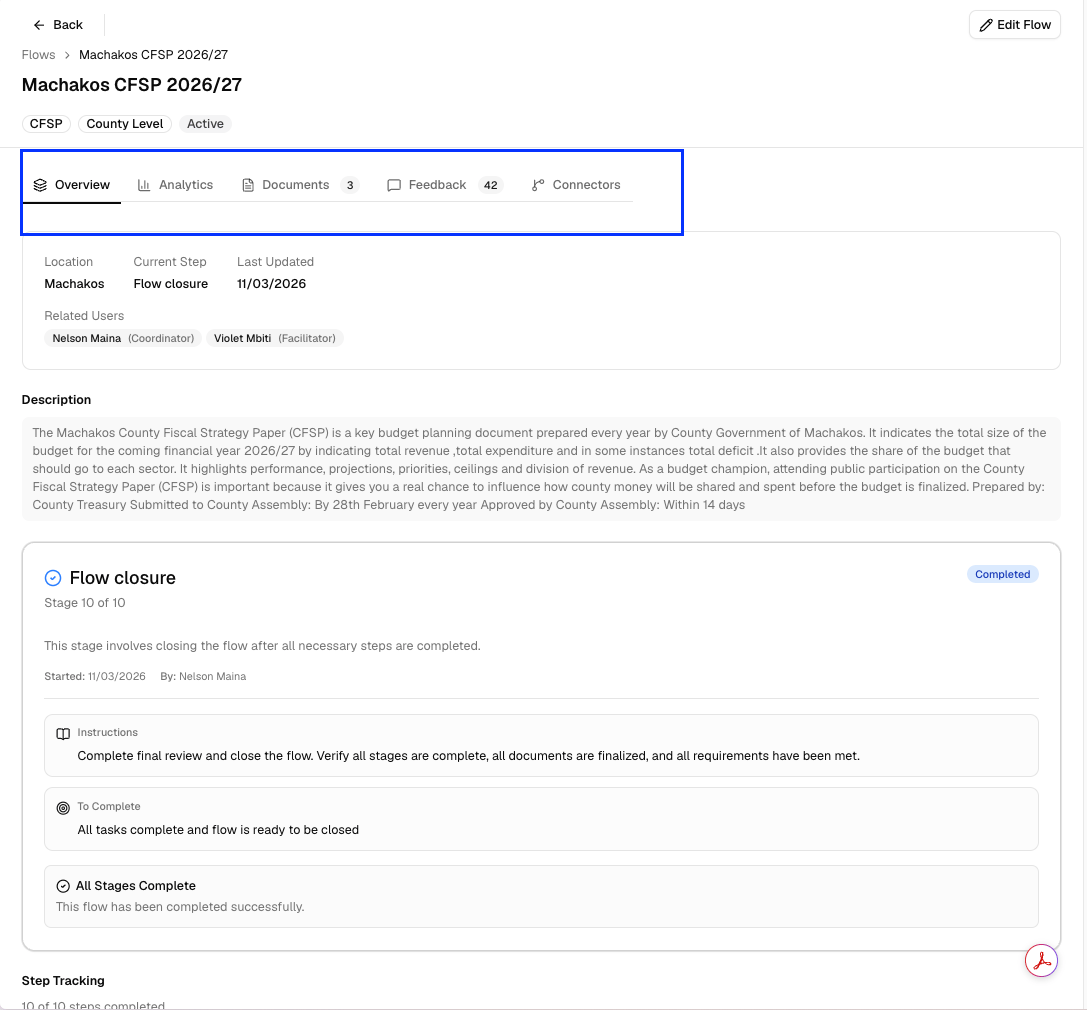
Flow detail tabs
Overview tab
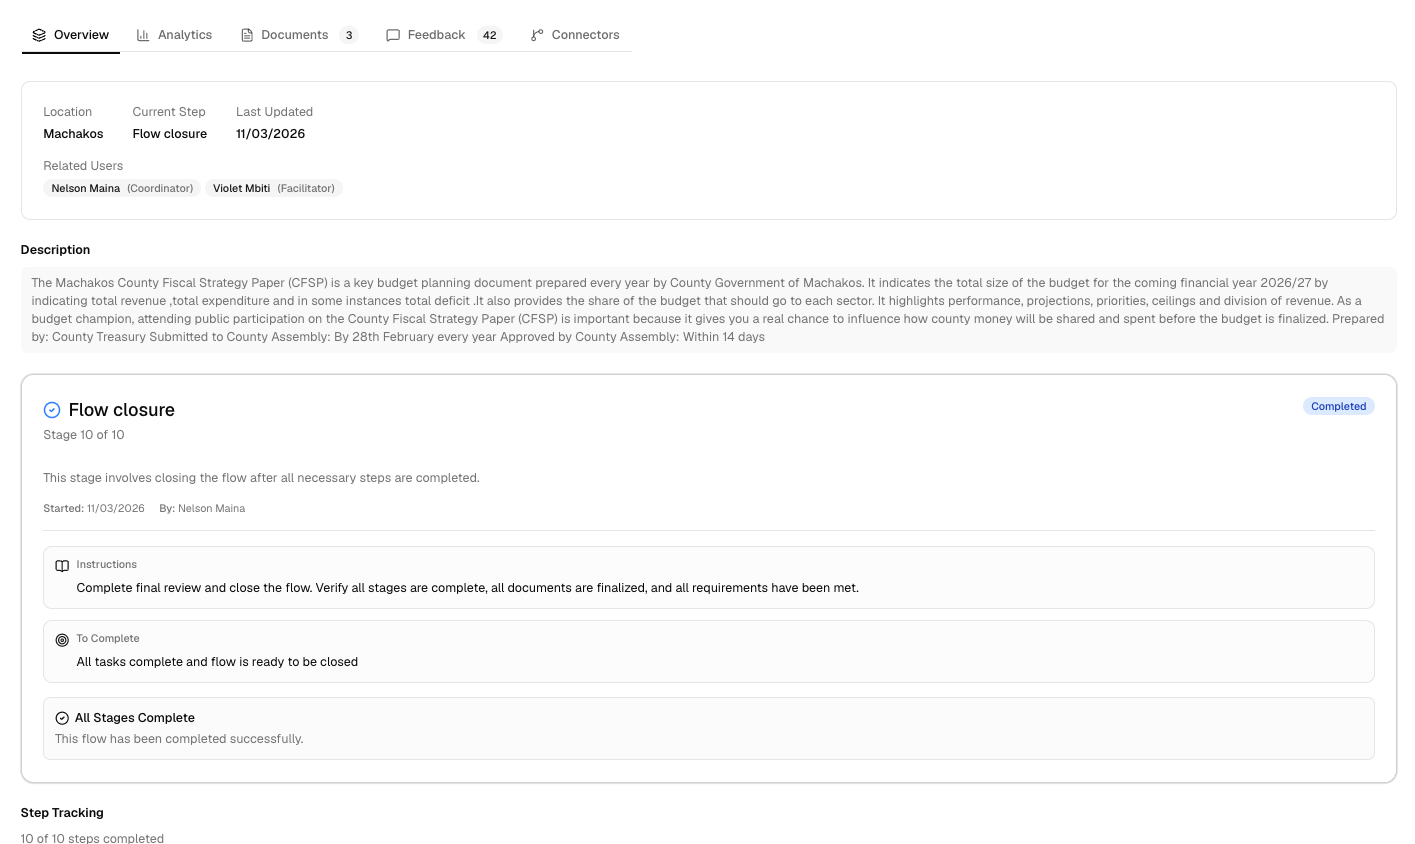
The Overview tab
- Location, Current Step, Last Updated, and Related Users (coordinator and facilitators assigned to the flow’s location)
- Description
- The current stage card: the active stage’s instructions and completion criteria (see Stage instructions below), with a button to advance it
- Stage Tracking: every stage in the flow’s lifecycle, with its status
Stage instructions
Every flow moves through the same set of stages. Some complete automatically; others need someone to confirm the work is done.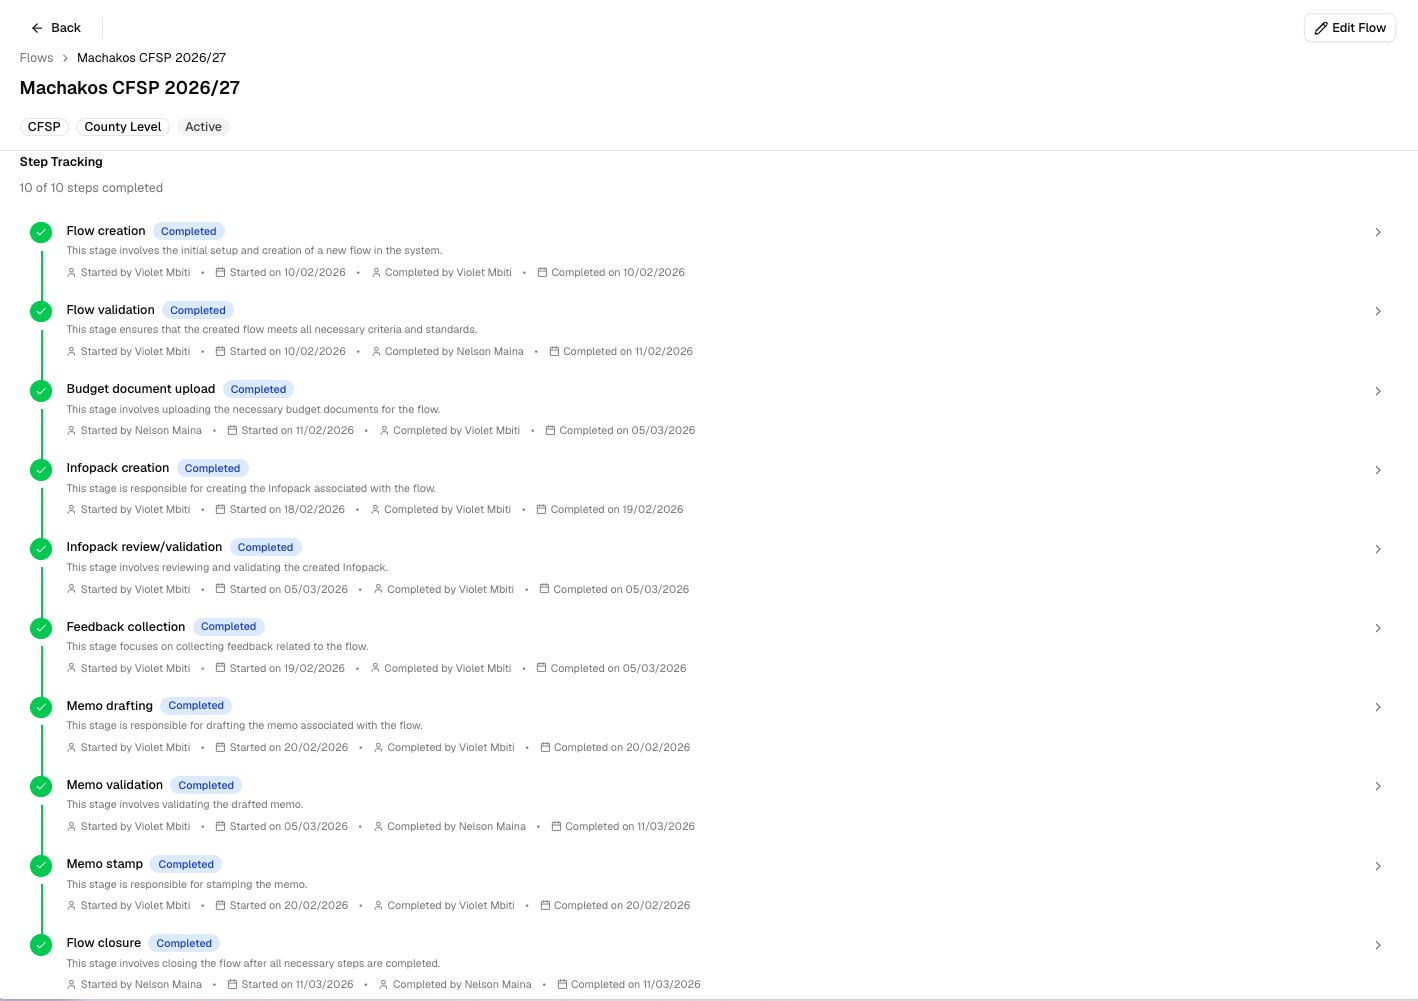
Step Tracking, showing every stage in the flow's lifecycle
1
Open a step
Click any step in Step Tracking to see its full instructions, completion criteria, and history (who started/completed it and when).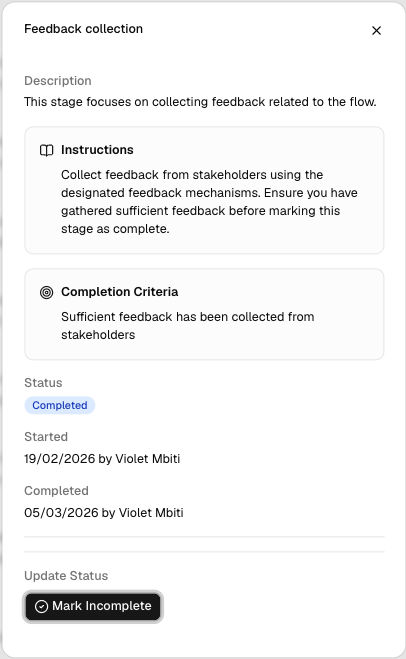
2
Update its status
If you have edit access and the step isn’t auto-managed, click Start Step or Mark Complete (or Mark Incomplete to reopen a completed step).
Some steps are auto-managed and can’t be updated manually. They complete
automatically based on another action (e.g. “Budget document upload” completes
itself once you upload the budget document).