> ## Documentation Index
> Fetch the complete documentation index at: https://guide.bajeti-ufahamu.org/llms.txt
> Use this file to discover all available pages before exploring further.
# Webapp: Connectors
> Bringing feedback in automatically from external platforms.
## The Connectors tab
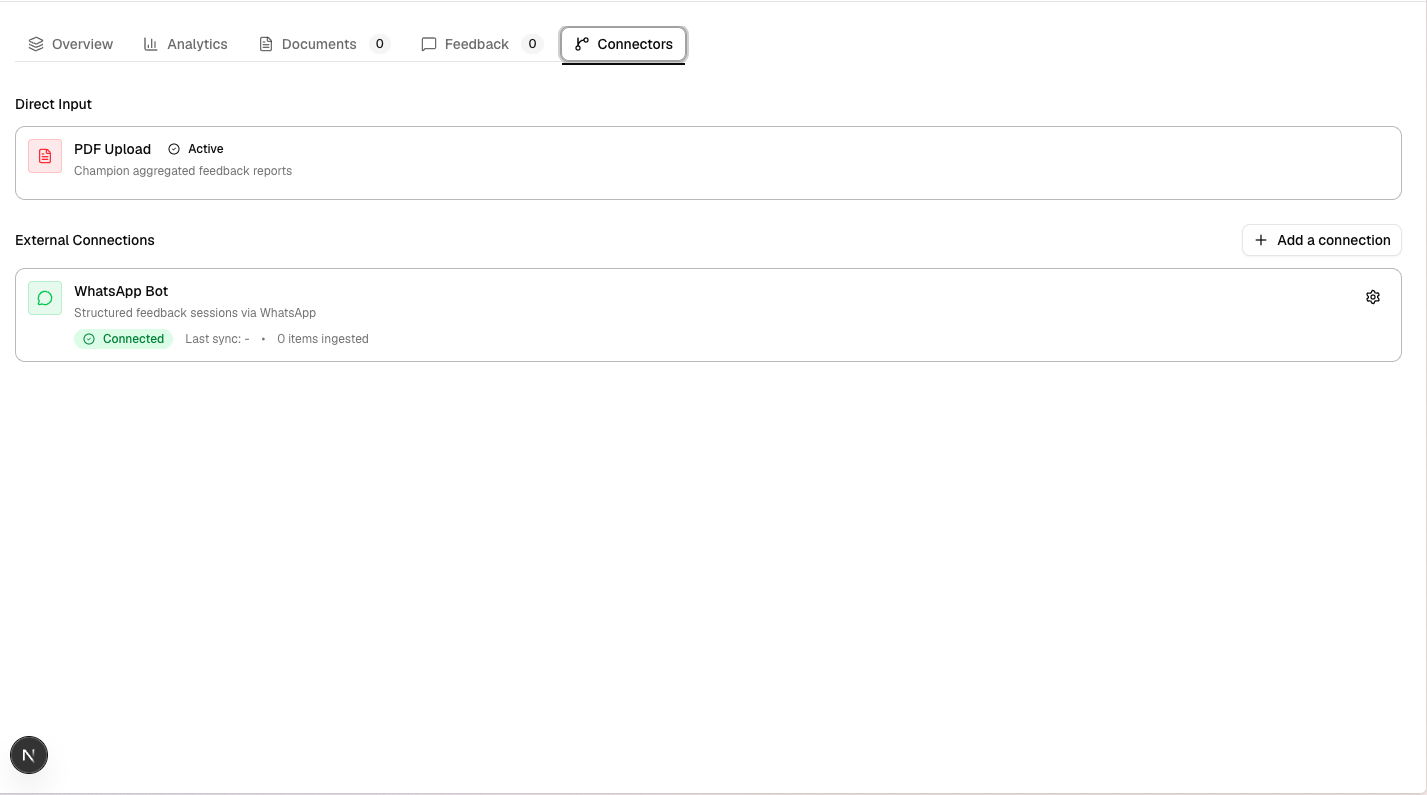
Every flow has a **Connectors** tab. It has two sections:
* **Direct Input**: always-on channels that are already configured: PDF Upload (Champion-submitted aggregated feedback reports) and whatsapp bot.
* **External Connections**: KoboToolbox and Google Sheets connections that pull structured submissions in as feedback automatically. This is where you add, edit, or remove connectors.
 Viewing this tab is open to all rolesvc. Adding, editing, deleting, or manually syncing a connector requires **Facilitator and above**, within your location.
## Add a connector
From the Connectors tab, click **Add a connection** (or **Add your first connection** if none exist yet).
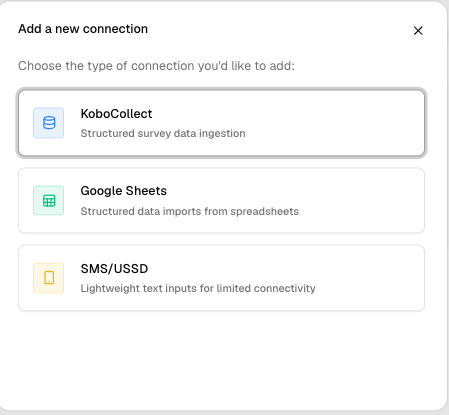
Pick **KoboCollect** or **Google Sheets**. (SMS/USSD and WhatsApp Bot connection types are listed but not yet available.) Kobo allows only one connection per flow; you can add multiple Google Sheets connections.
Viewing this tab is open to all rolesvc. Adding, editing, deleting, or manually syncing a connector requires **Facilitator and above**, within your location.
## Add a connector
From the Connectors tab, click **Add a connection** (or **Add your first connection** if none exist yet).
Pick **KoboCollect** or **Google Sheets**. (SMS/USSD and WhatsApp Bot connection types are listed but not yet available.) Kobo allows only one connection per flow; you can add multiple Google Sheets connections.
 ### Configure a KoboToolbox connection
Choose your Kobo server (`https://kf.kobotoolbox.org`, `https://eu.kobotoolbox.org`, or a custom URL). Use the "Help me find this" link if you're not sure which one applies.
Paste your Kobo API key. There's a "Help me find this" link here too.
Click **Connect to server**. This confirms your credentials and loads the list of Kobo assets (forms) available to you.
### Configure a KoboToolbox connection
Choose your Kobo server (`https://kf.kobotoolbox.org`, `https://eu.kobotoolbox.org`, or a custom URL). Use the "Help me find this" link if you're not sure which one applies.
Paste your Kobo API key. There's a "Help me find this" link here too.
Click **Connect to server**. This confirms your credentials and loads the list of Kobo assets (forms) available to you.
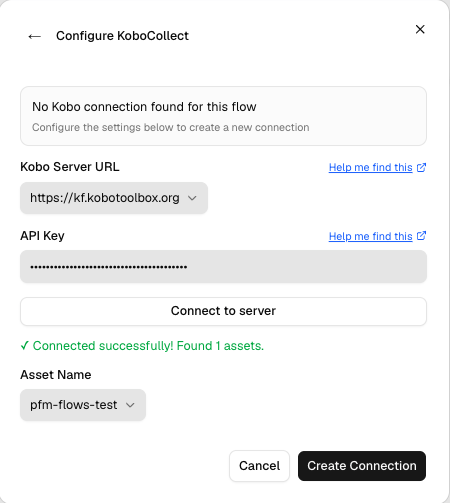 Choose the Kobo asset (form) to pull submissions from, then click **Create Connection**.
### Configure a Google Sheets connection
Give the service account `pfm-sheets-service-account@pfm-flows.iam.gserviceaccount.com` view access to your Google Sheet. The connection will fail without this.
Paste the Google Sheet URL and click **Connect**. This loads the list of worksheets in that spreadsheet.
Choose the Kobo asset (form) to pull submissions from, then click **Create Connection**.
### Configure a Google Sheets connection
Give the service account `pfm-sheets-service-account@pfm-flows.iam.gserviceaccount.com` view access to your Google Sheet. The connection will fail without this.
Paste the Google Sheet URL and click **Connect**. This loads the list of worksheets in that spreadsheet.
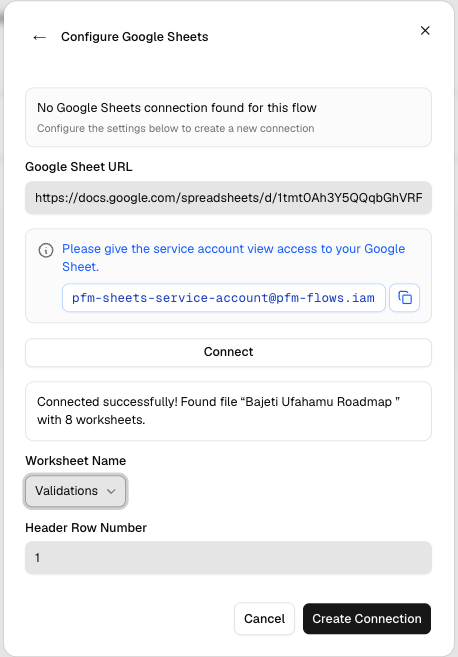 Choose the worksheet, set the **Header Row Number** (which row contains column headers), then click **Create Connection**.
## Ingest data
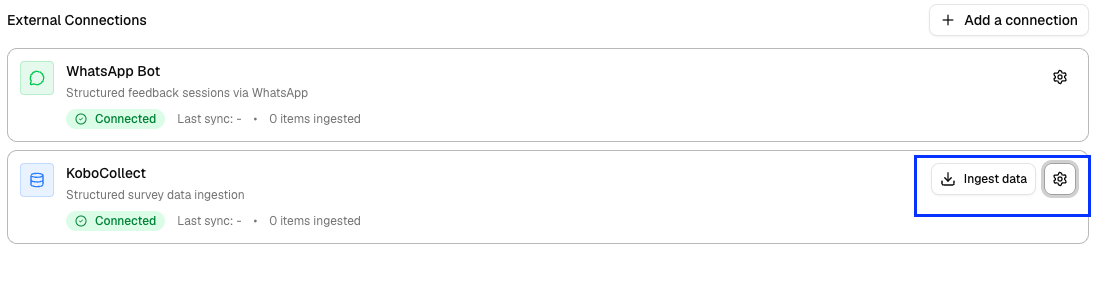
Once a connector is connected, click **Ingest data** on its card to pull in new submissions/rows on demand. The card shows last sync time and how many items have been ingested so far.
Choose the worksheet, set the **Header Row Number** (which row contains column headers), then click **Create Connection**.
## Ingest data
Once a connector is connected, click **Ingest data** on its card to pull in new submissions/rows on demand. The card shows last sync time and how many items have been ingested so far.
 ## Edit or refresh a connector
Click the **⚙** (gear) icon on a connector's card to reopen its configuration, update the server/sheet details, or use the refresh button next to the asset/worksheet selector to reload the list without re-entering credentials.
## Delete a connector
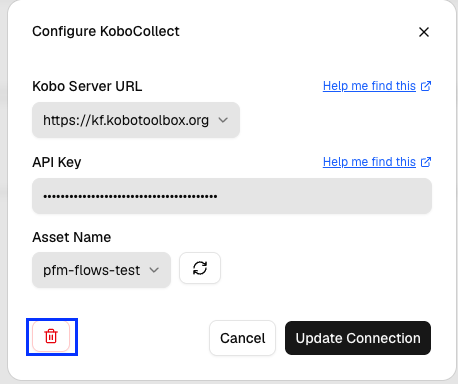
From the connector's configuration dialog, click the trash icon, then confirm. This can't be undone. Any feedback already ingested through that connection stays, but the connection itself and its sync history are removed.
## Edit or refresh a connector
Click the **⚙** (gear) icon on a connector's card to reopen its configuration, update the server/sheet details, or use the refresh button next to the asset/worksheet selector to reload the list without re-entering credentials.
## Delete a connector
From the connector's configuration dialog, click the trash icon, then confirm. This can't be undone. Any feedback already ingested through that connection stays, but the connection itself and its sync history are removed.